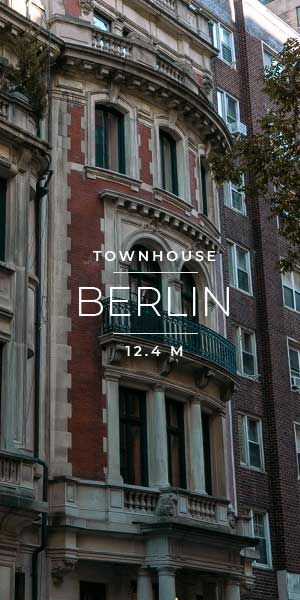
You have your first real estate agent as a customer or you are a real estate agent yourself and would like to build your own website for your company? Then you will eventually come across content management systems like WordPress. With content management systems such as WordPress or plugins and extensions, you can now, with a lot of practice and diligence, build your own website and save a lot of money compared to an advertising agency. For those who have fun with the material themselves or those who run a small advertising agency and set up their first real estate portal or first real estate agent page, this tutorial is just right. Whether real estate portal, house sale or real estate appraisal – Real estate agents have a difficult job: Today we help free of charge with creating exposés.
Many sites fail due to the fact that won visitors do not feel 100% comfortable. This could be because the images are not compressed and a page needs 30 or 40 seconds to load. Especially in rural areas where there is no fast Internet connection, loading photos at large file sizes and perhaps an extra video can quickly paralyze the computer. Of course you don’t wait forever but simply switch to another side. You must prevent this abort!
There are various ways to reduce the abort rate. You can find some important information and videos in my blog or on my YouTube channel.
Today we are looking especially at the topic of compression and maintenance with aspects of search engine optimization.
Selects the camera format with 4:3 or 16:9?
Before we can even start building our site, we need to consider whether any real estate elements output by our WordPress themes are well formatted. This means that the CSS of the WordPress theme is written so that every photo, no matter how it is uploaded, is always output correctly. In practice, however, this can not work, because one makes e.g. also portrait-format pictures. High formats in images are then automatically centered in the center and thus do not reflect the image section that was originally intended for the project. Another important point is that in some real estate listing often used sliders. This, too, is designed for a certain size so that you can be played correctly on all end devices, from notebooks and desktops to tablets and smartphones.
How do we guarantee a good function?
For every new real estate advertisement and every new photo of an apartment or house, there must be a uniform format. All photos are cut to exactly this format before they are played into the WordPress system.
What are the advantages?
Same layout on all pages and single pages
Compressed photos for fast loading times
Search engine optimized file names
The more similar the elements are, the higher the quality of a website will be. High quality websites are a guarantee and for us there are good sales deals. You should therefore pay attention to such details right from the start. Once you have established such a template in your company, your employees or yourself can fall back on it at any time. This saves you a lot of time and personnel costs afterwards and ensures higher sales. Your website will also be better rated by the search engines, as the time spent on your website will usually increase if the design elements fit perfectly. Therefore, our view lies on the advertisement creation.
Every camera has basically two formats with which you can take pictures. You can easily change this in the settings, no matter if Canon, Sony or other camera manufacturers. It is important to decide for only one format. Which format comes out of the camera is usually not so important. It is important that it is now correctly entered in the Photoshop template.
Now that we’ve learned everything we need to know about the reason for the optimization, we can take a closer look at the Photoshop template. As always, this template is available for free download for real estate agents, advertising agencies and media managers.
Both Photoshop files are already in a smaller format, with a maximum width of 1920 or 2000 pixels. This means your photos are still large enough for a visitor to view at full resolution on their computer. Just download the Photoshop file.
Once you have photographed the images, all you have to do is drag them from the memory card to your computer. Simply insert your SD memory card into the appropriate slot of your computer or card reader. In the following a file folder already opens, from this you can drag the pictures into your Photoshop file. So here’s what you do:
Enable card reader or insert SD card directly into computer
Open folder with image files and make selection
Position selection in Photoshop
Shrinking the images with Shortcut
Since all your images are in the same format as you can see in the tutorial video, you can enlarge or reduce all your images at the same time. To do this, select all layers, start at the first and press the Shift key with the mouse on the last layer. In the next step, press Ctrl+T to access the transformation model. This sounds complex at first, but is actually quite simple, for enlarging or reducing the images. Always make sure that you drag the images only at the edges, not at the sides. To do this, always press the Shift key. This enlarges or reduces the images proportionally. The format is not falsified. Here once again summarized
Legen your selection collected in Photoshop
Confirm with Enter to place the images
When all images have been saved, highlight the layers and press Ctrl+T
Scale the images in size with the Shift key pressed down now
Compressed storage for web and devices
Now we come to the storage of the picture material for our real estate advertisement. Here comes the clou, always save your photos compressed. While a photo in the same format without compression is still loosely 1.5 MB, we can compress it by 60 to 80%, perhaps even from 200 to 300 KB.
To do this, simply select File in Photoshop and Save for Web and Devices in Photoshop below the cloud version. Here you only have to make the following settings
Output – JPEG
Compression Quality – 50%
The next step is to assign the file name, here again you can worry a little about optimizing your rankings.
Search engine optimized file names Description
If you assign a file name, make sure that you do not use the file name formatting of your camera. Cameras only display numbered images, so they cannot describe which emotions an image reflects or which objects or locations are concealed here. That’s why we rename our pictures and call them instead of the standard edition:
We do this with all photos of our current property and vary the individual files depending on what can be seen on this picture. The prefix with the respective real estate object, the location and the district remains.
Insert into WordPress
We did it! Now we have prepared our new real estate homepage perfectly and have not only a beautiful WordPress theme, but also perfect image material that looks the same on every page. Instead of landscape and portrait format we use only landscape format images and of course all are compressed and optimized from the file name for the search engine.
If you are still looking for the right WordPress themes, then here are my recommendations for you!
https://lukinski.com/wp-content/uploads/2018/12/youtube-immobilien-makler-wordpress-theme-inserate-schalten-photoshop-seo-suchmaschinenoptimierung-hilfe-tutorial-blog.jpg5391200Stephanhttps://lukinski.com/wp-content/uploads/2024/04/lukinski-logo-real-estate-investment-germany-house-villa-off-market.svgStephan2018-12-18 18:42:302022-04-03 08:03:30Optimize real estate advertisements: Photoshop, WordPress and SEO – Video Tutorial